Sunday 26 November 2017

Life is beautiful art page with Magenta

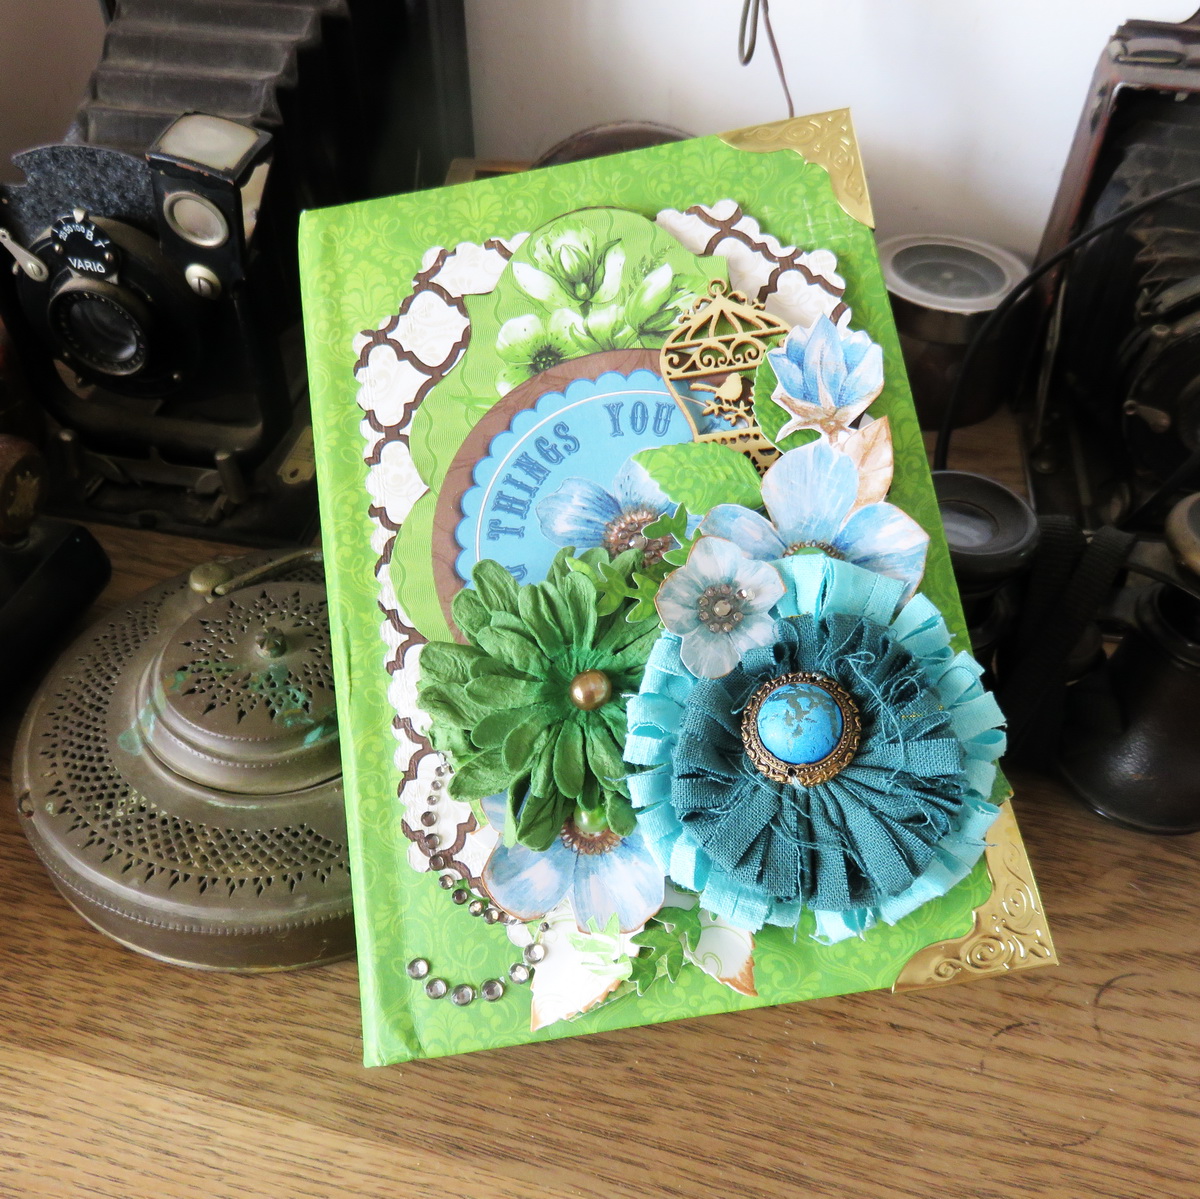
Hello my dear crafty friends and welcome to my new Magenta post.
Irit is here and this is my time for some artistic inspiration, aka art journal page made with three Magenta stencils and three large Magenta stamps.


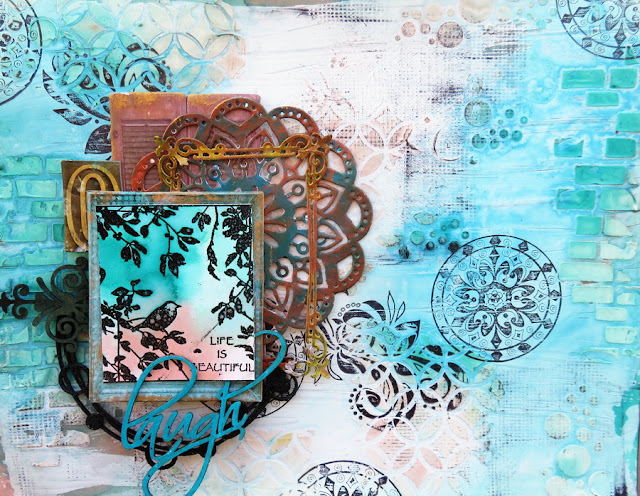
The whole page was made over a A4 sized white thick cardstock that was covered with white gesso.
Then the background was made with three Magenta stencils and white texture paste.
The colors were added one by one as I used mists to make the background of this page.
Then the abstract Magenta stamps were stamped with archival black ink and the small black net was made with a piece of old household net as a  kind of a stamp. 


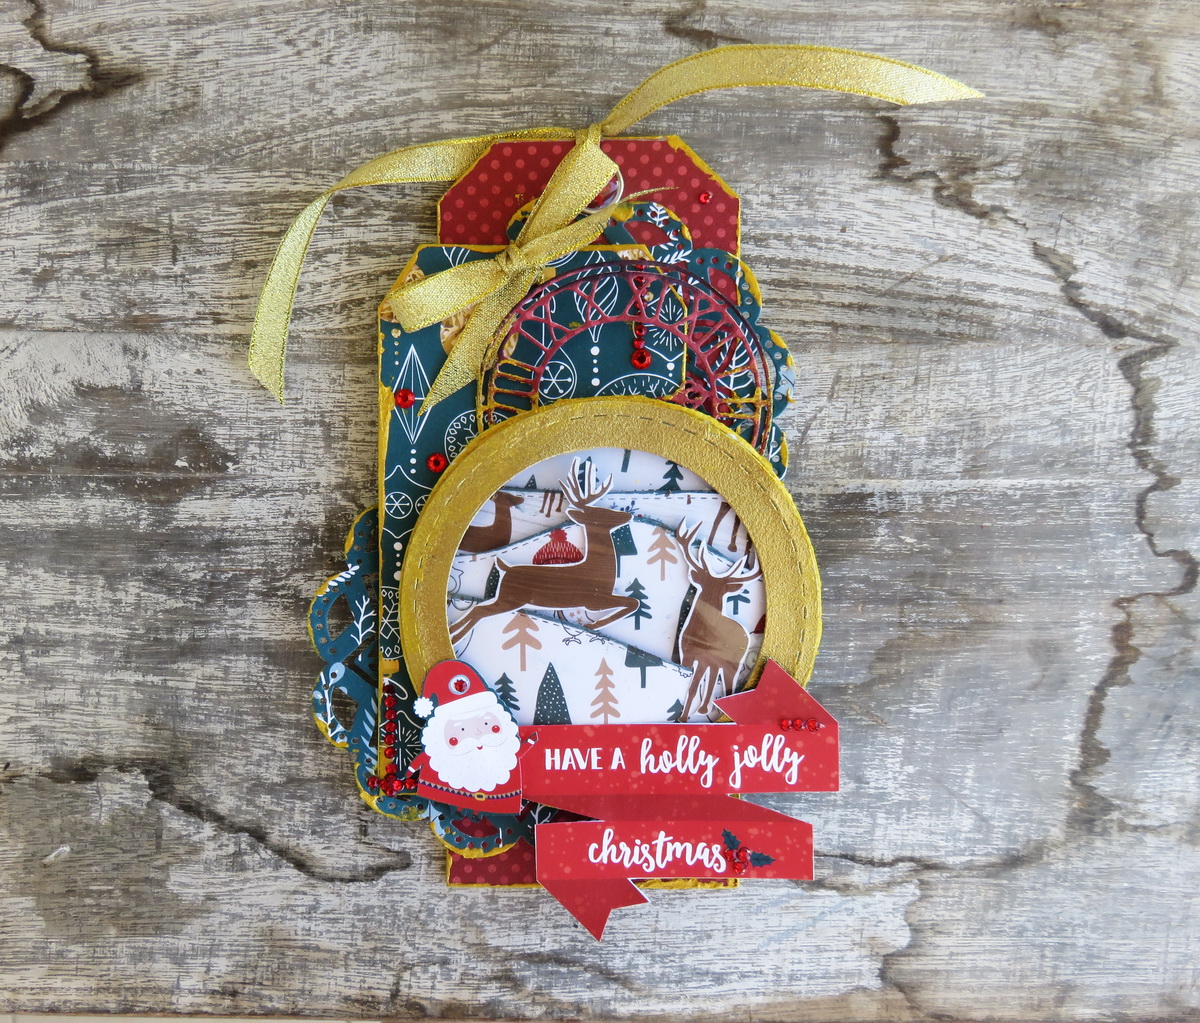
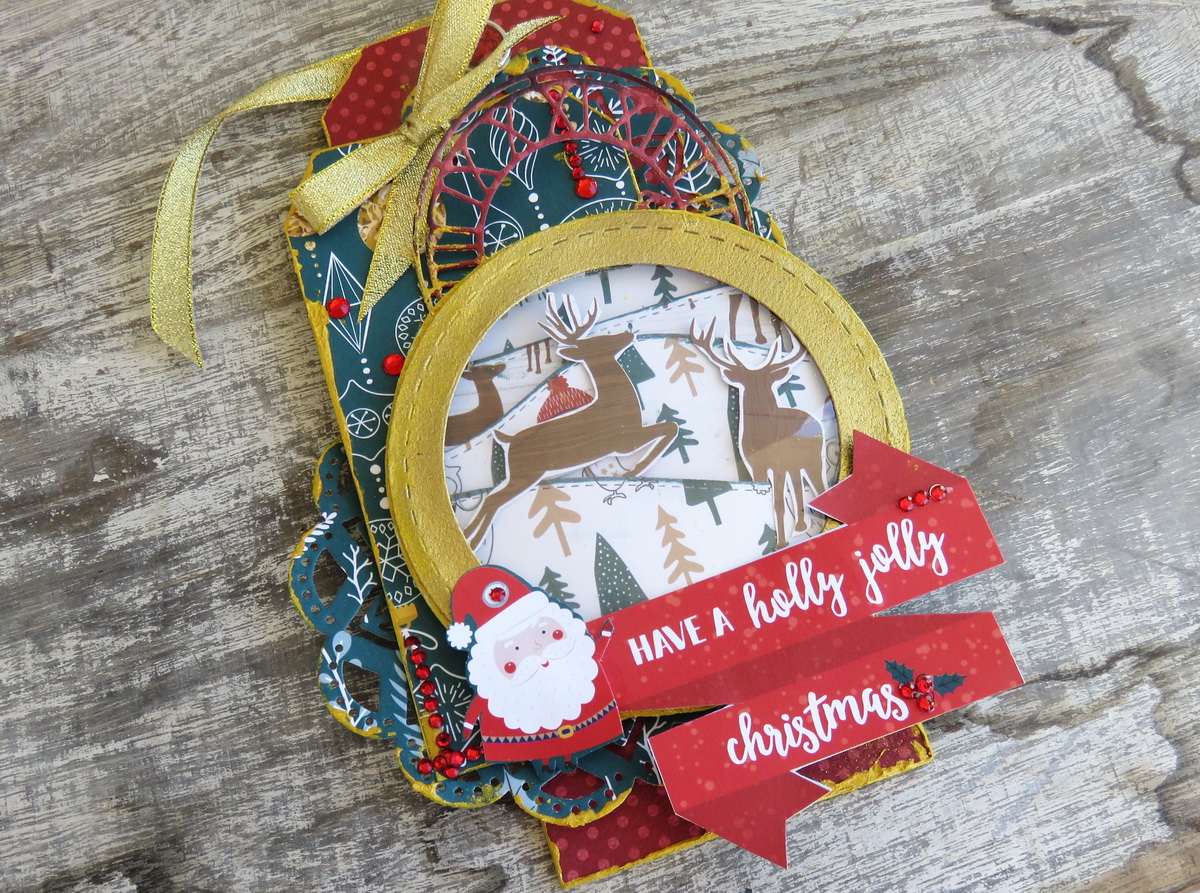
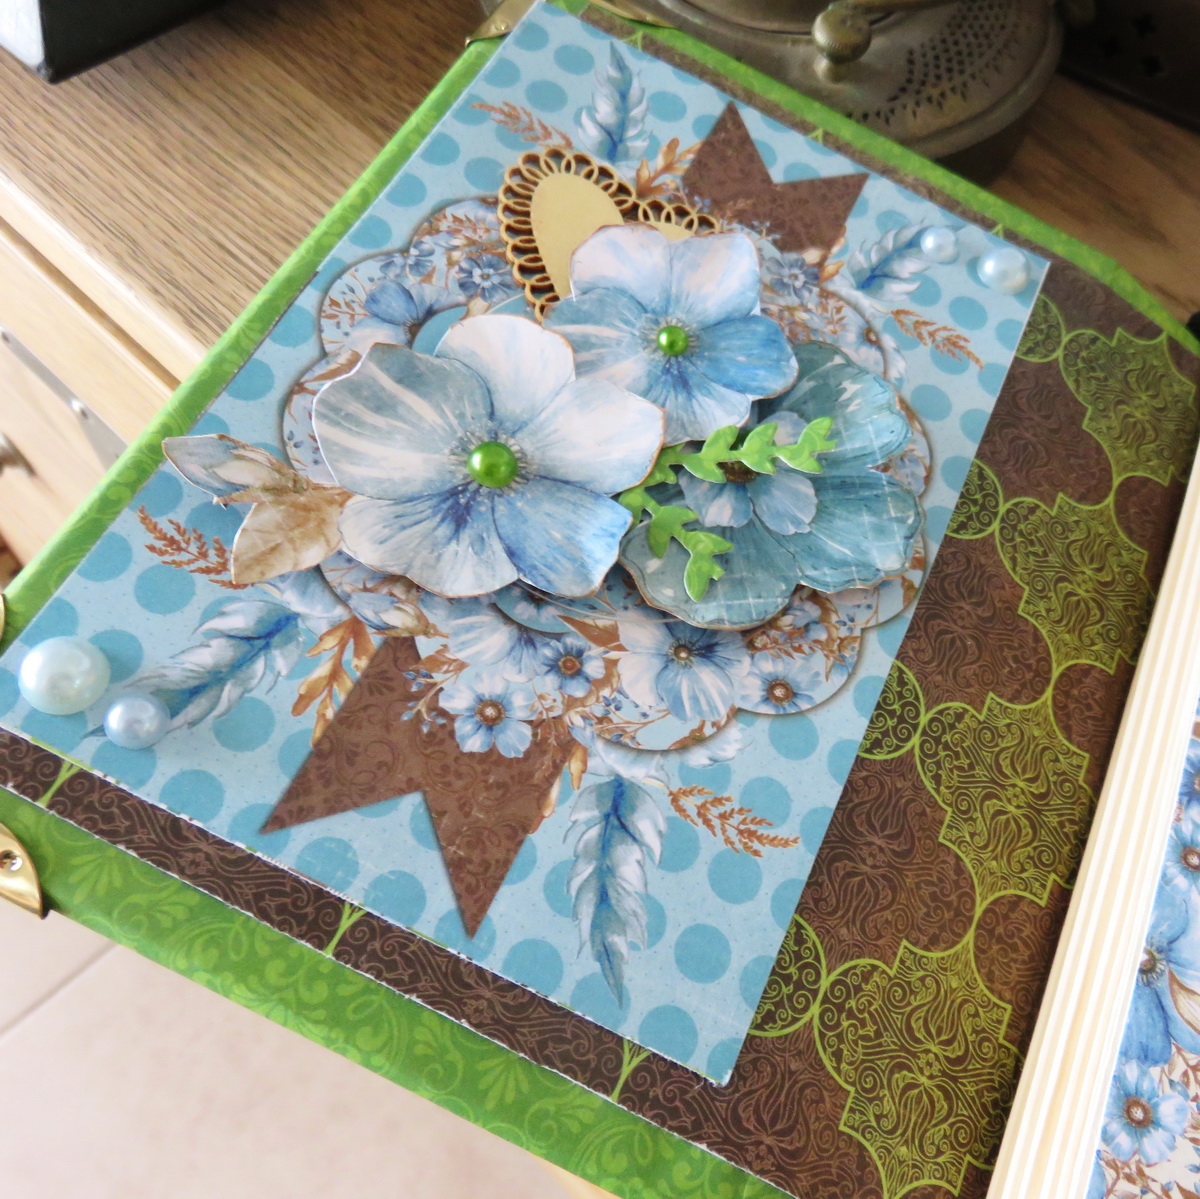
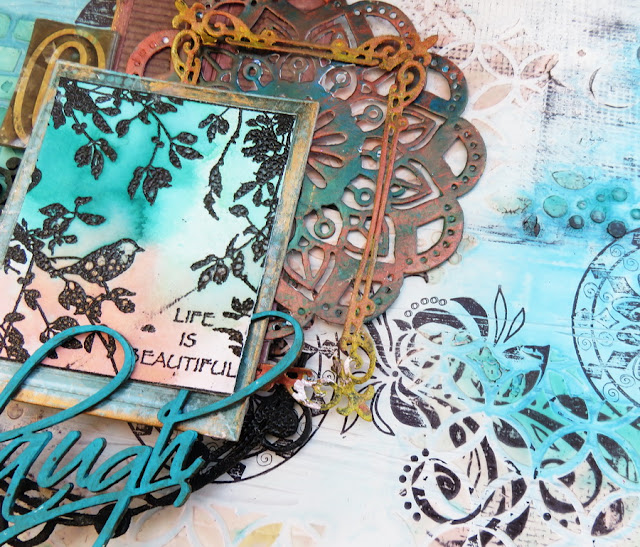
The central part was made as a cluster of chipboards, die cuts and more chipboards, mostly from BoBunny and some from other companies.
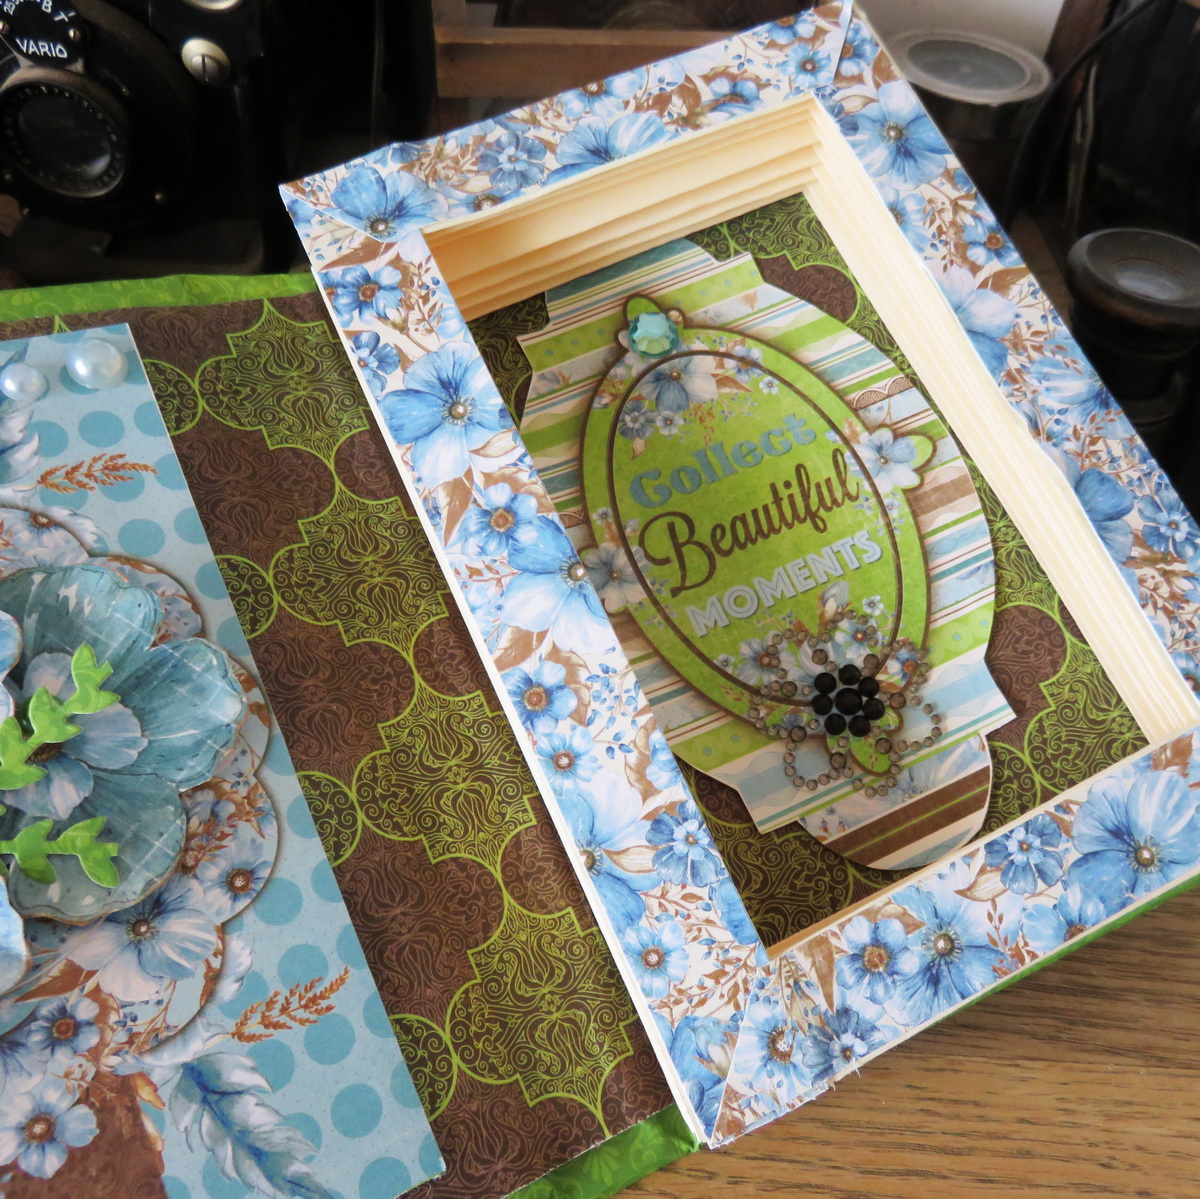
The central stamped image was stamped with black pigmented ink and heat embossed with clear embossing powder and then cut to fit the blue chipboard frame. The same mists that were used to cover the page were added to make the scene colors, but as this time the cardstock was bare without gesso the colors are more intense and seen.


The whole page looks like a kind of a scrapbooking layout with stamped piece instead of usual photos and it's not a real art journal page as it's not in journal book and not so flat. 
Anyway, this was a fine example of artistic use of Magenta products to make an artistic page/layout or any other Mixed Media project.

*****

Produits Magenta utilisés:

Magenta products used:


TM147


Add caption

TM179


Thanks for being hear with me and I hope that I inspired you a bit with my art work. 
Irit Shalom - DT Magenta


Friday 24 November 2017

Anything goes with TOPFLIGHT stamps


Hello my dear crafty friends and welcome to my last November Topflight Stamps shop post.
Irit is here and this is our " make it your favorite style" week.
So toady I made an art page using one big Rubber Dance stamps set that can be found in our Topflight Stamps shop.
I really love doing art pages, but this is my very first time to  leave the stamped images in black and white colors and to arrange them over colorful handmade background.


As you can see the background was made with black texture paste and one artistic stencil and then misted with a mix of three delicate colors.
All flowers from the stamp set were stamped with black pigmented ink and then heat embossed with clear embossing powder.
Each and every flower was hand cut and some of them were stamped over with the smallest texture stamps from the same set . Actually I used the small stamps as the background filler and the "white spaces over stamps" filler and it worked in the most perfect  way.


The chipboard title was painted in one of the background colors and I added a few splashes of the hot pink to add more interest to the page.

 Here is a stamp set used to make this page:

Texture Flowers stamp set


 Thanks for reading this blog post and I hope that you liked my artistic project today.
If you want to see more of my work you are kindly invited to my own blog.

Wednesday 22 November 2017

Use modelling paste with Tando


Hello my dear crafty friends and welcome to my new Tando altered door tag.
This week the design team member were asked to make a project with modelling paste and as you can see this door is totally made of modelling paste.


I used the MDF base with some texture stripes added using one of Tando  Stripes stencil and DecoArt texture paste.
Then the base was painted around.
The four  chipboard parts are the insides of the window covered with Gioanna- Doilie Tando stencil and texture made with texture paste.I used the middle part of the stencil only, the one with the small butterfly.
After it was dry the inside pieces were painted with more of DecoArt Media Line acrylics and metal pieces were added to make it a kind of the door.


 Tando products used to make this project:
Mask Stripes
Mask - Stripes

Gioanna- Doilie stencil
Giovanna - Doilie
Arch frame from the set- MDF base used
Shadow Frames

Arch window
DecoArt Media line

Monday 20 November 2017

More Christmas projects with BoBunny

Hello my dear crafty friends!
Irit is here again and this time I am going to share my second Christmas projects made with BoBunny new and fantastic Fa La La collection.
This time I decided to use the more traditional red and green colors from the collection and to show how we can make a set of simple mini cards and a more  difficult fancy layered tag.
So here are both projects together:

Christmas tag and mini cards set by Irit Shalom


 There are four mini cards in the  clear bag and I embellished the bag in the same style.

 This is an office clear bag with glue strip on the top (A2 size) and it keeps 4 cards in the perfect way as you can see.
Here is the bag without the cards and we can re- open it again and again the the strip is free from the embellishments on the top.
I just cut the cardstock circle and added two tags hand cut from the  paper with one single metal brad.
The lower embellishments cluster was made with the same circle, heart die cut and the hand cut Santa.


 And here are the cards: easy to make ones.
All are embellished with wooden shapes and some die cuts in the similar and easy to make style.


And after this simple project here is the fancy, huge and layered tag:


Actually it's a double tag and I added the thick chipboard base under the cardstock covers.
Two large die cuts were added over both tags (Clock and Mandala) and then I made this " shaker like circle" , but without the shaker add- ons inside.
I made it with layers of cardstock and added hand cut shapes inside. Then it was covered with acetate and gold painted circle.
The same  gold paint was added around the tags and even over the large die cuts.


 Here you can see all tag layers from the side.

Products used to make these projects:
BoBunny products:
Fa La La collection- 12*12'' cardstock- Fa La La, Sparkle, Noteworthy,Countdown, Be Merry, Christmas Tree, Deck the Halls, Holiday Hoot
Double Dot cardstock- Aquamarine, Dark Denim, Cranberry Dot
Christmas Wooden shapes
To and From dies
Mandala die
Ornate Heart die
Christmas card dies
3*4 Ornate frame dies
Tick Tock die
Double Dot Ruby Red jewels
Double Dot Ruby Red brads

Pentart products:
Creamy Acrylic Metallic Baroque Gold paint

Friday 17 November 2017

Gratitude cards - CAS-ual Fridays challenge

Hello my dear crafty friends and welcome to our new CAS-ual Fridays challenge!
 This week we challenge  you to make thanks cards or any other thanks project.
We really hope to see you playing with us and we are waiting to see your projects.


No automatic alt text available.


CAS-ual Fridays stamps and dies used:
Be stamp set
Smiling Fri- dies


There are no genre restrictions for this challenge. Link up your clean and simple designs or layer it on -- the choice is yours.  Make sure to link back to this blog post and include the graphic below in your post for consideration of being chosen a winner.
What are your playing for? 10 winning entries will be highlighted on this blog each Thursday before a new challenge is set to go live the next day.  In addition, Michele has generously offered up a $25 gift certificate to the overall winner at CAS-ual Friday stamps. And if that weren't enough, if the chosen winner has used CAS-ual Friday stamps and/or dies as the main focus in the card, that gift certificate will increase to $50.


So don't wait! Play with us and you can be our WINNER!

Loving thougths with Topflight stamps

Hello my dear crafty friends!
Irit is here again and this week we were challenged to make project with stamps from the most gorgeous Carabelle Studio that you can find in our Topflight Stamps shop.
Each and every stamp set from this company is totally unique and fit for any Mixed Media project, scrapbooking or pretty simple cardmaking.
So here is my Mixed Media card made with  one single stamp set " as is"- I used each and every stamp in the set in different techniques.


The basic background was made with one artistic stencil and texture paste.
Then the background color was added with mists  and the main image was stamped with clear embossing ink and heat embossed with black embossing powder.
The butterflies were stamped over the thick cardstock in the same way and then hand cut  and added with 3d foam  glue over the card.
The sentiment was stamped with white embossing powder over black cardstock  and just a few rhinestones  were added to finish this card.
As  you can see this can be made with totally different colors of mists. If you are in this pink or purple mood you can do this card pink and purple. If you are in this fall kind of mood it can be done orange and  deep red and green. Just pick the color and it's done in no time.
Just remember to jump to our Topflight Stamps shop and to grab this delicious stamp set.


 Stamp set used to make this card:
Loving thoughts 

Thanks for being here today with me and see you next Friday with another stamped inspiration.
And if you want to see more of my work you are kindly invited to my own blog.

Thursday 16 November 2017

Collect Beautiful Moments shadow box with Penelope collection

Hello my dear crafty friends! Irit is here today and I welcome you to my new craft tutorial made with a video tutorial.
Shadow box with Irit Shalom


 This shadow box is very easy to make and it can be used as a real gift box or as a gift card holder or even as a photo frame.
Just make one or many with the most gorgeous BoBunny new released Penelope collection as as you can see this project has no Mixed Media products or hard to get ones. On the other hand even if you only have this paper collection and a few BoBunny embellishments you can make this beauty in a really short time.
This is how it looks when opened:


 One side is just the embellished side and it should be pretty flat if you want to close the box after all.
The  deep box side is embellished just a bit as we want it to be ready for the small gift or photo or whatever you wish to add inside.


 As you can see the left inside has some depth, but not too much.

 The box right side has the space for anything  you want to add  inside.

 Here is another close- up to the left box side.
I used wooden heart shape, some hand cut from the cardstock flowers and a couple of die cut pieces (the parts of the larger die cut frame from Ever after cards dies.
 The cover was embellished with the same hand cut flowers, die cut leaves and some paper and fabric flowers with the add on of the wooden birdcage and some rhinestones.

You can see all steps on this video link HERE:

And also the products list was added to the video, I add it here again  for the easier  future use.
BoBunny products used to make this project:
Penelope collection 12*12'' cardstock: Moments, Abbey, Grace, Laugh, Live
Ever After card dies
Lovely Leaf dies
Double Dot Aqua jewels
Double Dot Emerald jewels
Licorice jewels
Heart wood shapes
Birdcage wood shapes


Thanks for being here with me today and for watching my video. I am still on my learning curve, but I think it's easy to understand tutorial and hope you would try to make the similar project some day.

Merry Christmas door hanger with Tando : Anything goes with Tando


Hello my dear crafty friends!
Welcome to my Anything goes weekly project here on Tando  blog.
I made the fancy, shabby style Christmas door hanger.


This Tando door hanger was covered with DecoArt Media line paints and mediums over the texture paste
 masked snowflakes images (mostly seen on the handle on the top).
Large grid chipboard piece was painted with gesso and some crackle paste and added as the middle layer .
Then the embellishment cluster was made from cardstock, flowers, clay frame and metal trinket.


 I also enter this project to some web challenges:

Addicted to stamps and more- Holidays


IamRoses- Anything goes challenge with their products- all flowers

Believe in Fantasy Mixed Media canvas

Hello my dear crafty friends!
This is my second art piece made this month just for some web challenges.
I used Lindy's Stamp Gang mists from November challenge to make this piece and this is the first challenge I add thei canvas for.


Lindy's Stamp Gang November challenge
Sprays used:
Urban Amethyst, Tweedle Dee Denim, Steampunk Sepia, Grab a Guy Gold and King Midas Gold embossing powder


 Country view challenges - Stencils
 Non card challenges- Bingo
I picked the diagonal- Digital picture,Mask, Flowers line
 

Memories Door canvas

Hello my dear crafty friends!
This canvas is a first of a few Mixed Media projects made  this month just for some web challenges.
So this is my door shaped Memories canvas and it's also perfect notebook cover (if I decide to add it over the same size notebook or journal). I made over the stencilled canvas with chipboards  hand made door over. I used a lot of stencils over the piece and a huge mix of mediums, paints, waxes and mists.
More then Dusty Attic chipboards there are a clay mold piece, a few metal pieces, Prima and other flowers.


I enter this  piece to Dusty Attic November challenge
November Challenge 2017

I also enter this piece to Mixed Media and Art November challenge. I was inspired by the colors of the lower left spot,texture on the midlle circle and general mood of grunge and vintage looks.It sure is a kind of misterious door to our precious memories.

November challenge "Mysterious"

Popular Posts